If you’re running out of iCloud storage, or simply want to create a backup of your photos, transferring them to an external hard drive is a great solution. This article will guide you through the process step-by-step, ensuring a smooth and efficient transfer.
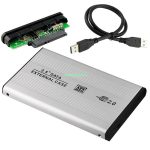
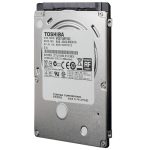
Preparing Your External Hard Drive
Before you begin, make sure your external hard drive is compatible with your Mac or PC. Most modern drives will work just fine. Here’s how to prepare it:
- Connect the Drive: Plug your external hard drive into your computer using the appropriate cable (usually USB).
- Format the Drive: If necessary, format the drive to ensure compatibility. On a Mac, you can do this in Disk Utility. On a PC, use Disk Management. Choose the exFAT format for compatibility with both Mac and PC.
- Create a Backup Folder: Create a new folder on your external hard drive to store your iCloud photos. This will help keep your files organized.
Using iCloud Drive (Mac and PC)
- Open iCloud Drive: On your Mac, iCloud Drive should be accessible from the Finder. On a PC, you can access it through the iCloud for Windows app.
- Find Your Photos: Navigate to the Photos folder within iCloud Drive.
- Select Photos: Choose the photos or albums you want to transfer. You can use Command (Mac) or Control (PC) to select multiple items.
- Drag and Drop: Drag the selected photos and drop them into the backup folder on your external hard drive.
Using iCloud Photos (Mac)
- Open Photos App: Launch the Photos app on your Mac.
- Choose Photos: Select the photos or albums you want to transfer.
- Export Photos: Go to File > Export > Photos to Folder.
- Choose Destination: Select the backup folder on your external hard drive.
- Export: Click Export.
Downloading photos to the computer
Downloading iCloud Photos to a PC:
- Install iCloud for Windows: Download and install the iCloud for Windows app from the Apple website.
- Sign In: Sign in to your Apple ID.
- Enable Photos: In the iCloud settings, enable the “Photos” option.
- Choose Download Options: Click Options and select “Download Originals to My PC” to download the original versions of your photos.
- Sync Photos: Wait for your photos to sync with your PC.
Additional Tips:
- Check Download Progress: Monitor the download progress in the Photos app or iCloud settings.
- Optimize iCloud Storage: If you’re running low on iCloud storage, consider optimizing your iCloud Photos settings or purchasing additional storage.
- Use Wi-Fi for Large Downloads: For large photo libraries, it’s recommended to use a Wi-Fi connection with a strong signal to ensure faster and more reliable downloads.
By following these steps, you can successfully download your iCloud photos to your Mac or PC, allowing you to have a local copy of your images for easier access and management.
Using iCloud Photos (PC)
- Download iCloud for Windows: If you haven’t already, download and install the iCloud for Windows app.
- Open iCloud for Windows: Launch the app.
- Choose Photos: In the iCloud settings, enable the Photos option.
- Sync Photos: Click Options and ensure that Download Originals to my PC is selected.
- Access Photos: Once your photos have synced, you can find them in the Photos folder within iCloud Drive.
- Transfer Photos: Follow the same steps as Method 1 to transfer the photos to your external hard drive.
Transferring downloaded photos to the external hard drive
Once you’ve downloaded your iCloud photos to your local device (Mac or PC), you can easily transfer them to an external hard drive for safekeeping. Here’s how:
Locate Downloaded Photos:
- Mac: The downloaded photos will typically be located in the Photos library or a designated download folder.
- PC: Check your Downloads folder or the location specified during the download process.
Copy or Cut Photos:
- Copy: Right-click (or Control-click on a Mac) on the selected photos and choose “Copy.”
- Cut: If you want to move the photos instead of copying them, choose “Cut” instead.
Paste Photos to External Hard Drive:
- Open Destination Folder: Navigate to the folder on your external hard drive where you want to store the photos.
- Paste Photos: Right-click (or Control-click) in the folder and choose “Paste.”
Verify Transfer:
- Check Photos: After the transfer is complete, open the destination folder on your external hard drive and verify that all the photos have been copied successfully.
By following these steps, you can efficiently transfer your downloaded iCloud photos to an external hard drive, creating a reliable backup and preserving your precious memories.
Additional Tips
- Check Progress: Monitor the transfer progress to ensure it’s proceeding smoothly.
- Verify Transfer: After the transfer is complete, verify that all your photos have been copied correctly.
- Create Multiple Backups: Consider creating multiple backups of your photos on different drives or in the cloud to protect against data loss.
- Optimize iCloud Storage: If you’re still running low on iCloud storage, explore options like optimizing your iCloud Photos settings or purchasing additional storage.
Ensuring sufficient storage space on the external hard drive
When transferring iCloud photos to an external hard drive, it’s crucial to ensure that the drive has enough space to accommodate your entire photo library. Here are some tips to help you gauge and manage your storage needs:
Estimate Your Photo Library Size:
- Photos App: If you’re using the Photos app on your Mac or PC, you can often find information about your photo library size within the app’s settings or preferences.
- iCloud Settings: Check your iCloud settings to see how much storage space your photos are currently occupying.
- Third-Party Tools: Some third-party software can provide detailed analysis of your photo library size and storage usage.
Consider Photo Quality and Format:
- Image Resolution: Photos with higher resolutions (e.g., 4K, 5K) will take up more space.
- Image Format: RAW images typically require significantly more storage than compressed formats like JPEG.
- Video Files: If you have videos stored in iCloud, these can contribute substantially to your overall storage needs.
Check Your External Hard Drive Capacity:
- Drive Specifications: Consult the specifications of your external hard drive to determine its total storage capacity.
- Free Space: Use your computer’s file explorer or disk management tools to check how much free space is available on the drive.
Plan for Future Growth:
- Anticipate Additions: Consider how much your photo library is likely to grow over time. Factor in future photos, videos, and other media.
- Future Storage Needs: If your photo library is expanding rapidly, you might want to invest in a larger external hard drive or explore cloud storage options for long-term storage.
Regularly Monitor Storage Usage:
- Periodic Checks: Check the remaining storage space on your external hard drive periodically to ensure it’s sufficient.
- Delete Unnecessary Files: If you’re running low on space, consider deleting unnecessary files or moving them to another storage device.
Additional Tips:
- Compress Images: If you have large image files, consider using image compression software to reduce their size without compromising quality.
- Consider Cloud Storage: For long-term storage or to offload files from your local devices, explore cloud storage services like iCloud, Google Drive, or OneDrive.
- Use External Hard Drive Management Tools: Some tools can help you optimize your external hard drive’s performance and storage usage.
By carefully estimating your photo library size, considering image quality and format, and planning for future growth, you can ensure that your external hard drive has enough space to accommodate your iCloud photos and provide a reliable backup solution.
By following these steps, you can easily transfer your iCloud photos to an external hard drive, creating a reliable backup and freeing up valuable iCloud storage space. Remember to regularly update your backups to ensure that your precious memories are always safe.