Solid state drives (SSDs) have revolutionized computer performance. Unlike traditional hard disk drives (HDDs) that rely on spinning platters, SSDs use flash memory for faster data access. This translates to quicker boot times, snappier application launches, and an overall smoother computing experience. If you’re looking to breathe new life into your aging PC, installing an SSD is a cost-effective and relatively simple upgrade.
This guide will walk you through the process of installing an SSD, from gathering the necessary tools to migrating your data and operating system (OS). Here’s what you’ll need to get started:
Before You Begin:
- Compatibility Check: Ensure your computer has a free SATA (Serial ATA) port for a 2.5-inch SSD or an M.2 slot for an M.2 NVMe SSD. Consult your computer’s manual or manufacturer’s website for specific details.
- SSD Selection: Choose an SSD with enough storage capacity to meet your needs. Consider factors like your budget, the type of programs you use regularly, and the amount of data you typically store. Research different SSD models to find the best performance and value for your money.
- Backup Essentials: Crucially, back up all your important data before starting the installation process. This includes documents, photos, videos, and any other irreplaceable files. You can use an external hard drive, cloud storage service, or a combination of both for backup.
Gathering the Tools:
- Phillips head screwdriver: Essential for securing the SSD in its designated bay.
- Anti-static wristband (optional): While not strictly necessary, an anti-static wristband can help prevent accidental electrostatic discharge (ESD) that could damage your computer’s components.
- SATA cables (if needed): Most motherboards come with SATA cables, but it’s a good idea to check beforehand. If you’re installing a 2.5-inch SSD as a secondary drive, you might need an extra SATA cable.
Installation Process:
-
Power Down and Unplug: First and foremost, power down your computer completely and unplug it from the power outlet. Additionally, remove any peripherals connected to your computer, like external hard drives or printers.
-
Open the Case: Locate the side panel screws on your computer case and carefully remove them. Lay the panel aside on a flat surface in a well-lit area.
-
Locate the Storage Bays: Identify the storage bays within your computer’s case. These are typically metal cages designed to house hard drives and SSDs. You might see existing hard drives already installed in some of these bays.
-
Prepare the SSD (Optional): For a 2.5-inch SSD, you might need to remove a mounting bracket from an existing hard drive bay and attach it to your new SSD. Consult your SSD’s manual for specific instructions.
-
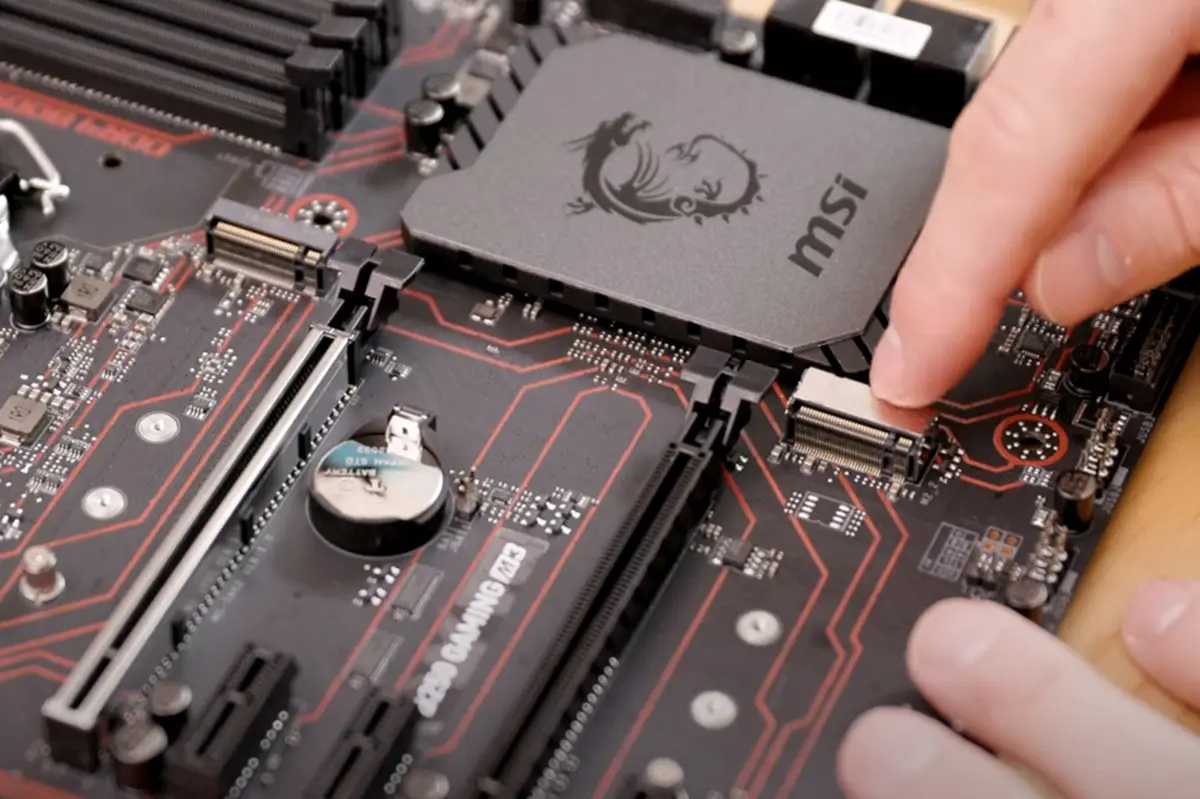
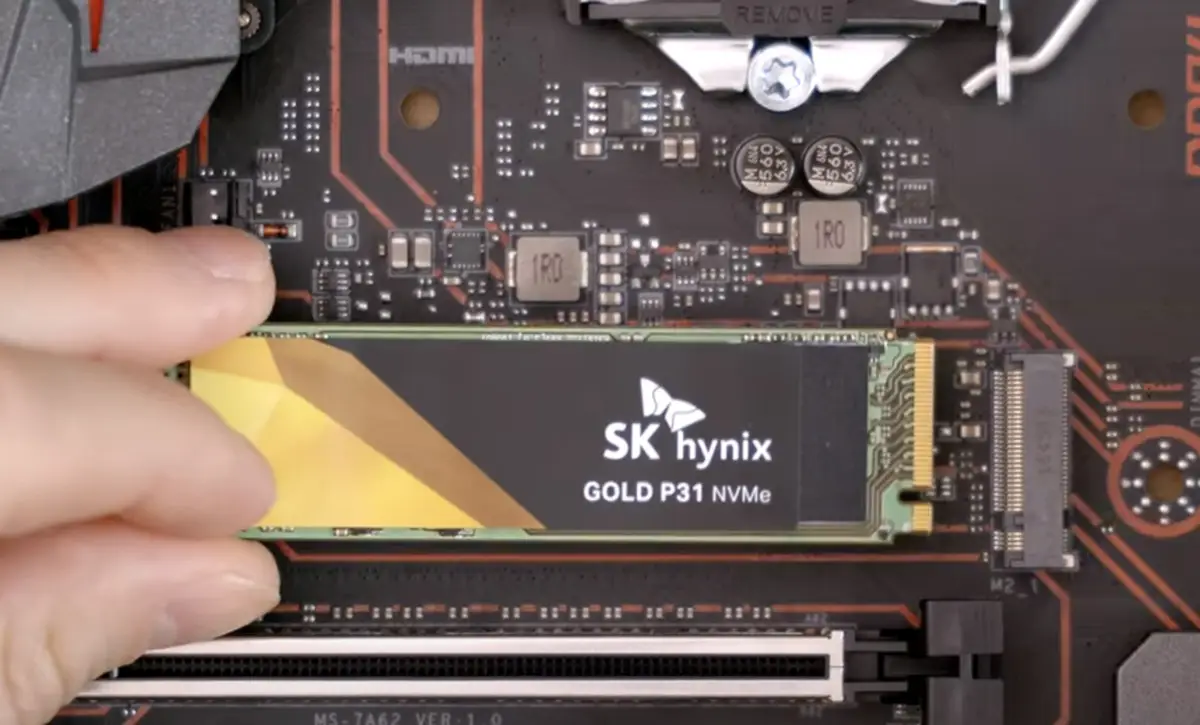
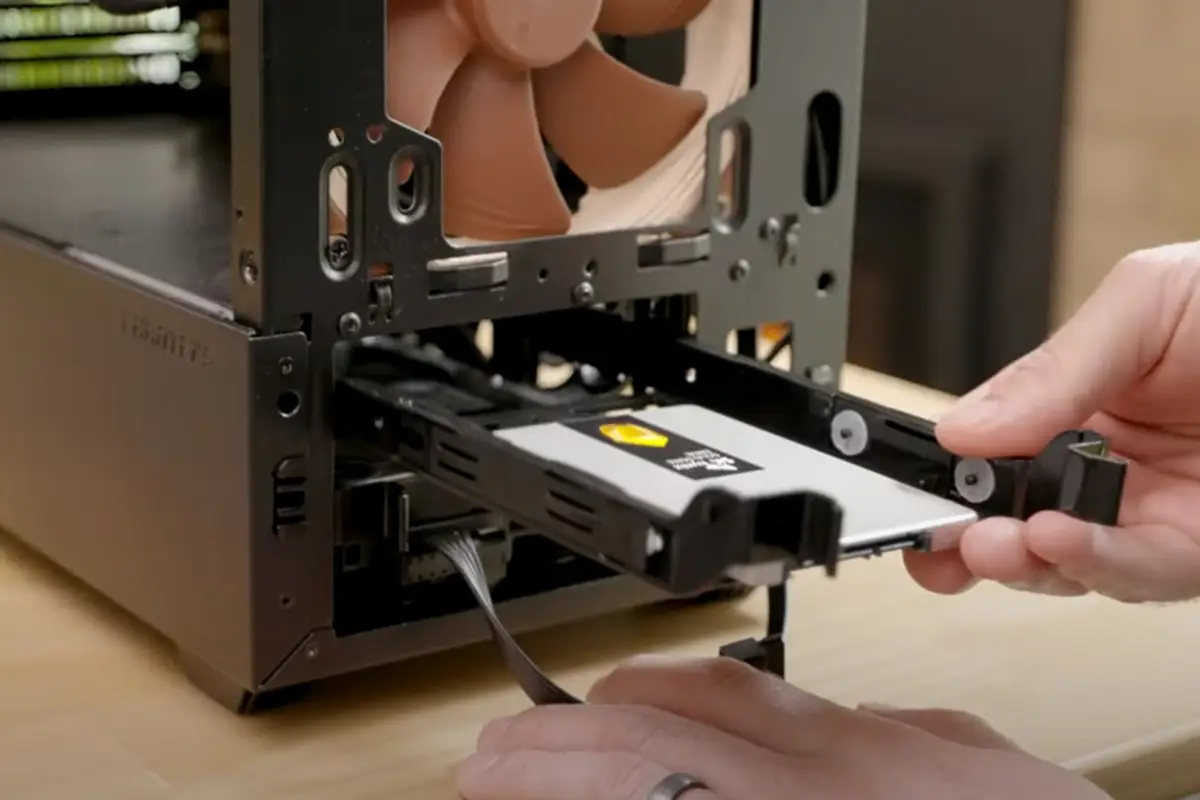
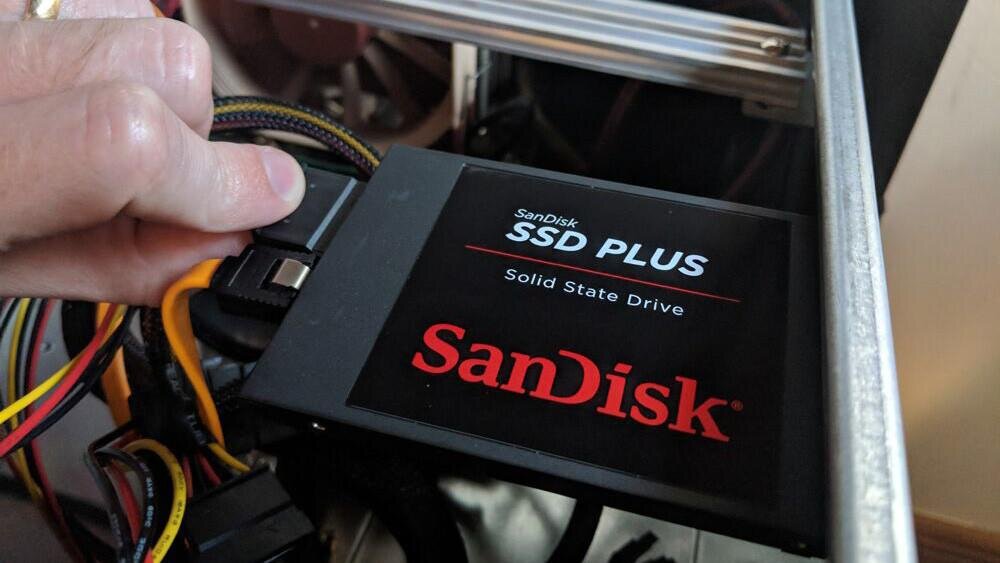
Install the SSD: Slide the SSD into a vacant storage bay, aligning the screw holes. Securely fasten the SSD using the provided screws or the mounting bracket screws you previously attached. M.2 SSDs simply slot into the dedicated M.2 slot on the motherboard and are secured with a small screw.
-
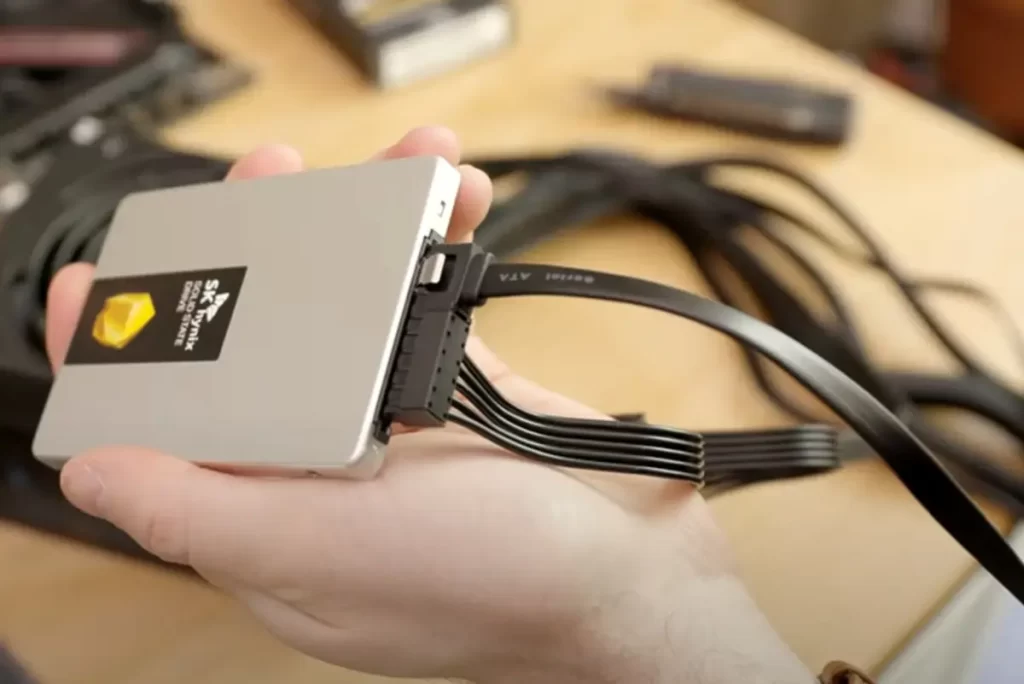
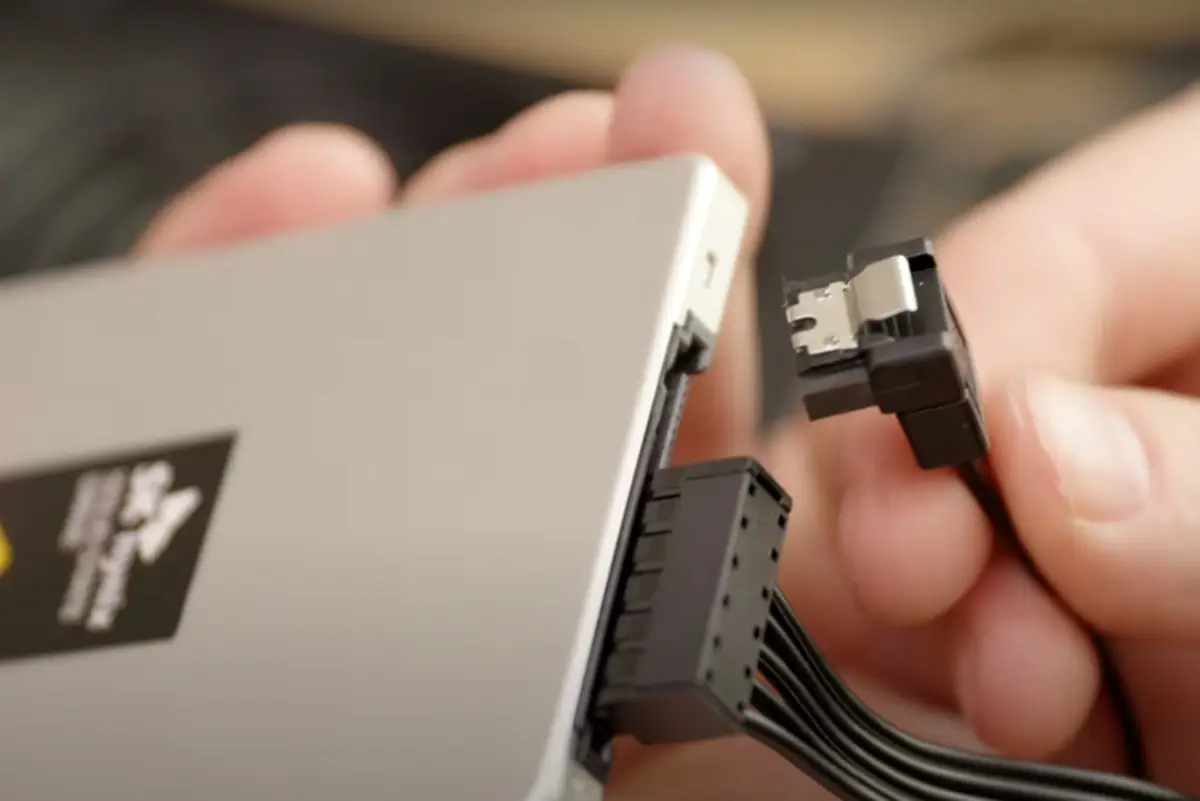
Connect the Cables: Locate the SATA ports on your motherboard. These are typically flat, L-shaped connectors with multiple colored slots. If you’re installing the SSD as your primary drive, connect the SATA data cable to one of the SATA ports (preferably SATA 3 for optimal performance) on your motherboard and the other end to the corresponding SATA connector on your SSD. Additionally, connect the power cable from your power supply unit (PSU) to the power connector on your SSD. M.2 SSDs don’t require separate data cables as they connect directly to the motherboard.
-
Organize Cables: Carefully manage the data and power cables to ensure they don’t obstruct airflow within your computer case. You can gently tie them together with cable ties (not included) for better organization.
-
Close the Case and Reconnect: Double-check that all connections are secure and nothing is loose inside the case. Carefully put the side panel back on and screw it shut. Reconnect your peripherals and power cord.
Migrating Your OS (Optional):
If you’re replacing your existing hard drive with the SSD and want to use it as your primary drive, you’ll need to migrate your operating system and data to the new SSD. This process can be done using various methods, depending on your OS and comfort level. Here are two common approaches:
- Cloning Software: Several software tools allow you to clone your entire hard drive onto the SSD. This creates a replica of your existing drive, including your OS, programs, and data. Research reputable cloning software.
- Clean Installation: This method involves formatting the SSD and installing your OS from scratch. This is a cleaner approach but requires reinstalling all your programs and manually transferring your data.
Whichever method you choose, ensure you have a valid backup of your data before proceeding.
Booting Up with Your New SSD:
-
Power On: Plug your computer back into power and turn it on. If you installed the SSD as your primary drive, your computer should automatically boot from it.
-
Initializing the Drive (Optional): In some cases, your operating system might need to initialize the new drive before you can use it. This is a quick process typically handled by your OS during the first boot.
-
Performance Improvement: Once booted up, you should immediately notice a significant improvement in your computer’s speed. Applications will launch faster, boot times will be quicker, and overall responsiveness will be enhanced.
Additional Tips:
Formatting the Old Drive (Optional):
If you’re not replacing your existing hard drive, you can format it and use it for additional storage. Formatting erases all data on the drive, so ensure you’ve backed up anything important beforehand.
Updating Drivers:
For optimal performance, consider updating your storage drivers to the latest version compatible with your new SSD. You can usually find driver updates on your motherboard manufacturer’s website.
Installing an SSD is a straightforward process that can significantly improve your computer’s performance. By following these steps and taking the necessary precautions, you can successfully upgrade your system and enjoy the benefits of faster boot times, quicker application launches, and an overall smoother computing experience. If you encounter any difficulties during the installation process, consult your computer’s manual, the SSD manufacturer’s website, or online tech forums for additional guidance.