In today’s digital world, capturing memories and storing important files is easier than ever. Our iPhones have become powerful tools for photography and document management. However, when storage space runs low, transferring files to an external source becomes necessary. This is where an SD card reader comes in handy.
Unlike traditional computers, iPhones lack built-in SD card slots. But fear not! With the right adapter and a little know-how, you can seamlessly transfer photos, videos, and documents between your iPhone and an SD card.
Choosing the Right SD Card Reader
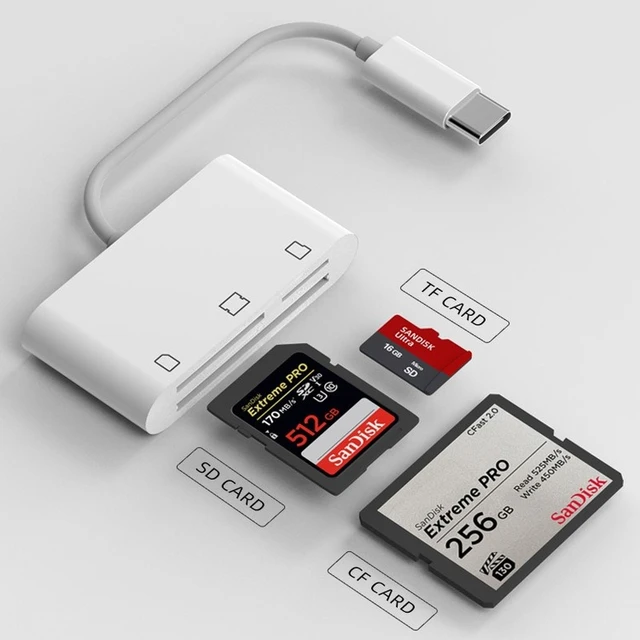
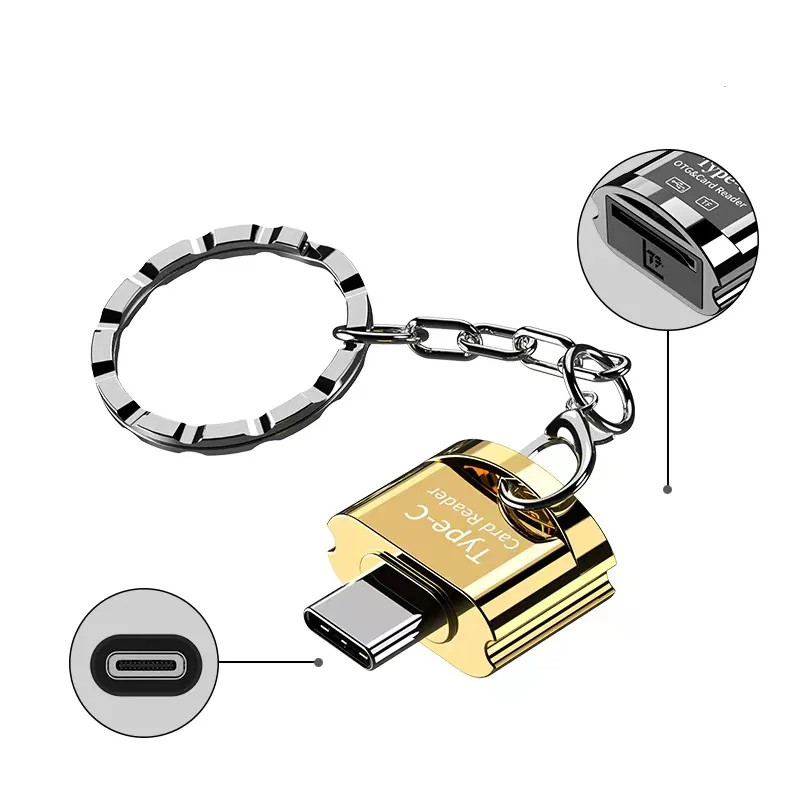
The first step is selecting a compatible SD card reader. iPhones utilize a Lightning connector or a USB-C port for charging and data transfer. Here’s a breakdown of the two reader options:
-
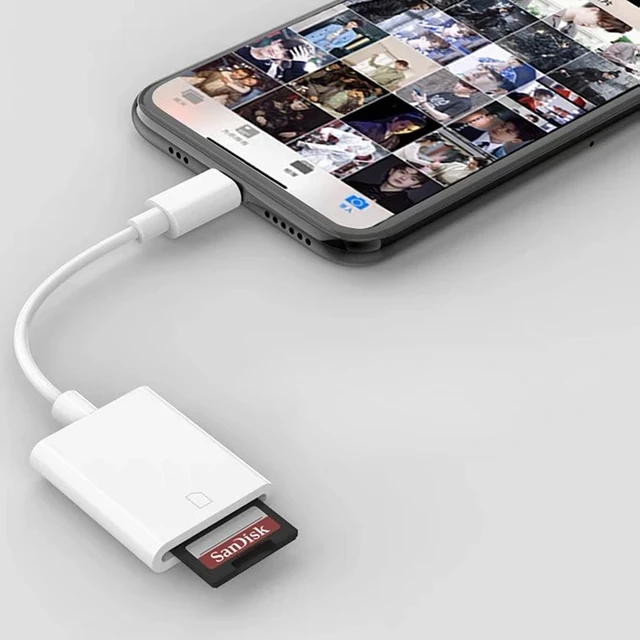
Lightning to SD Card Camera Reader: This reader features a Lightning connector on one end that plugs directly into your iPhone’s charging port. On the other end, it has an SD card slot for inserting your memory card.
-
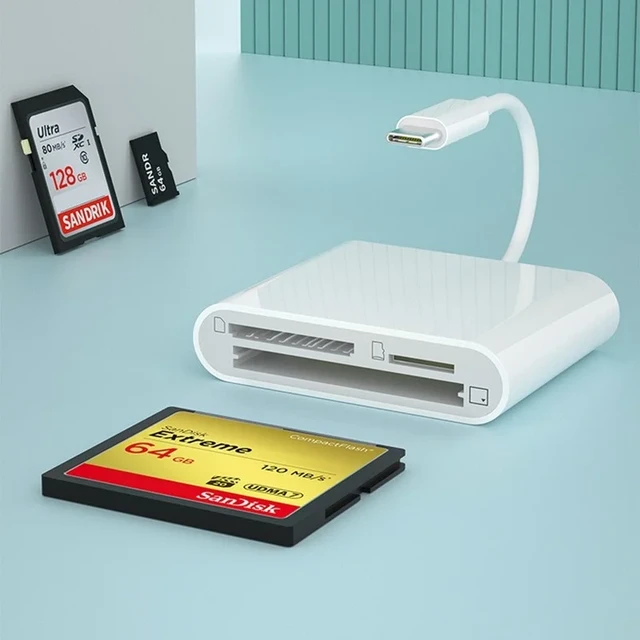
USB-C to SD Card Camera Reader: For iPhones with a USB-C port (like the latest iPhone models), this reader offers a USB-C connector on one end and an SD card slot on the other.
Additional Considerations:
-
Brand: While Apple offers its own SD card reader adapters, there are many reputable third-party options available at competitive prices.
-
Features: Some SD card readers offer additional functionalities like built-in memory or dual slots for different card types (microSD, SDHC, etc.). Consider your specific needs when making a choice.
Setting Up Your SD Card Reader
Once you have your SD card reader, the setup process is straightforward.
-
Power Up: It’s recommended to connect your iPhone to a power source during the transfer process. This ensures a smooth operation and avoids any potential interruptions due to low battery.
-
Insert the SD Card: Locate the SD card slot on your reader and carefully insert the SD card. Make sure the orientation is correct – most cards have a small notch on one corner that should face the reader’s opening.
-
Connect the Reader to Your iPhone: For Lightning connector readers, simply plug the Lightning end directly into your iPhone’s charging port. For USB-C readers, connect the USB-C end to your iPhone’s port.
A Note on Compatibility: While most SD cards should work seamlessly, it’s always a good practice to check the card’s compatibility with your iPhone’s operating system version.
Discuss limitations and potential restrictions
While SD card readers offer a convenient way to transfer files between your iPhone and external storage, there are some limitations and restrictions to consider, especially regarding specific data types. Here’s a breakdown of what you might encounter:
-
App Data and Settings: Unfortunately, transferring app data and settings directly to an SD card isn’t possible. Apps rely on specific configurations within your iPhone’s internal storage to function properly. There might be workarounds involving cloud backups or app-specific transfer methods, but SD cards aren’t a viable option in this case.
-
Streaming Content: Music, movies, and TV shows downloaded from streaming services often come with restrictions that prevent copying them to external storage. These limitations are built into the files themselves and enforced by the streaming service to control content distribution.
-
Encrypted Files: If you have encrypted files on your iPhone, transferring them to an SD card might require additional steps depending on the encryption method used. Some encryption tools offer the ability to decrypt and then transfer the files, but it’s important to understand the specific encryption software you’re using and its compatibility with SD card transfers.
-
Security Concerns: While SD cards offer portability, they can also be physically lost or stolen. Be mindful of the type of data you’re transferring, especially sensitive information. Consider using encryption tools on the SD card itself or storing highly confidential data on your iPhone’s internal storage with its built-in security features.
-
SD Card Capacity and Speed: SD cards come in various capacities, so ensure your card has enough space to accommodate the data you plan to transfer. Additionally, SD card speed can impact transfer times. Slower cards might lead to long wait times, especially when dealing with large files. Consider using high-speed SD cards, especially if you’re transferring a significant amount of data regularly.
Provide instructions on safely disconnecting the SD card reader
Here’s how to safely disconnect your SD card reader from your iPhone to prevent data loss or damage:
1. Use the Files App: Before disconnecting the reader physically, it’s crucial to properly eject the SD card within the Files app. This ensures any ongoing file transfers are completed and avoids corrupting data.
-
Open the Files app on your iPhone.
-
Locate the “Locations” or “Browse” section within the Files app.
-
Identify your SD card listed by its name or “Untitled.” Tap on it to access its contents.
-
Look for an “Eject” button next to your SD card’s name. This button might be located at the top of the screen or within the options menu (usually represented by three dots). Tap on “Eject.”
2. Wait for Confirmation: The Files app will display a confirmation message once the SD card is safe to remove. This might say “It is now safe to disconnect [SD card name].”
3. Physically Disconnect: Once you see the confirmation message, you can safely unplug the SD card reader from your iPhone’s Lightning or USB-C port.
4. Optional: Power Down: While not always necessary, some users recommend powering down your iPhone briefly after disconnecting the reader for an extra layer of security, especially if you were transferring a large amount of data.
By following these steps, you can ensure a smooth and safe disconnect of your SD card reader, protecting your valuable data on both the SD card and your iPhone.
Transferring Files with the Files App
Now that everything is connected, it’s time to access your SD card content. Here’s how to use the built-in Files app on your iPhone:
-
Open the Files App: Locate and launch the Files app icon on your iPhone’s home screen.
-
Navigate to Your SD Card: Within the Files app, look for a section labeled “Locations” or “Browse.” Here, you should see your SD card listed under a name like “Untitled” or the name you assigned to it. Tap on the SD card icon to access its contents.
-
Browsing and Selecting Files: Once you enter the SD card directory, you can browse through photos, videos, and documents just like you would on your iPhone’s internal storage. Tap on individual files to preview them.
-
Importing Photos and Videos: For photos and videos specifically, you might see an “Import” option directly within the Files app. This allows you to import the selected files directly into your iPhone’s Photos app.
-
Transferring Other Files: For non-media files like documents or PDFs, you’ll need to use a compatible app that supports opening and saving those file types. Open the desired app, locate the “Import” or “Open In” function within the app, and navigate to your SD card to select the files for transfer.
Additional Tips:
-
Importing All Files: Within the Files app, on your SD card directory, you may have the option to “Select” all files at once. This allows for a quicker import of all content on the card, followed by choosing the destination (Photos app or a specific app) for the transferred files.
-
Moving vs. Copying: During the transfer process, decide whether you want to move the files from the SD card to your iPhone (removing them from the card) or copy them (keeping them on both the card and your iPhone).
-
Ejecting the SD Card: Once you’ve finished transferring files, it’s important to safely eject the SD card reader from your iPhone. Within the Files app, locate and tap on the “Eject” button next to your SD card’s name.