In today’s digital world, capturing precious moments on camera is easier than ever. But what happens when your camera’s storage fills up, and you need to free up space for more photos and videos? This is where a trusty SD card reader comes in. By utilizing a card reader with your iPhone, you can effortlessly transfer those memories from your camera’s SD card directly to your phone, creating a convenient backup or freeing up space on your camera.
However, iPhones, unlike some Android devices, don’t have built-in SD card slots. Fear not, photography enthusiasts! Apple offers a variety of adapter options to bridge the gap between your iPhone’s Lightning port and the world of SD cards. Let’s delve into the process of using a card reader on your iPhone, from choosing the right adapter to navigating the file transfer.
Selecting the Right SD Card Reader
There are two main types of card readers to consider for iPhone use: those with a Lightning connector and those that require a separate adapter.
-
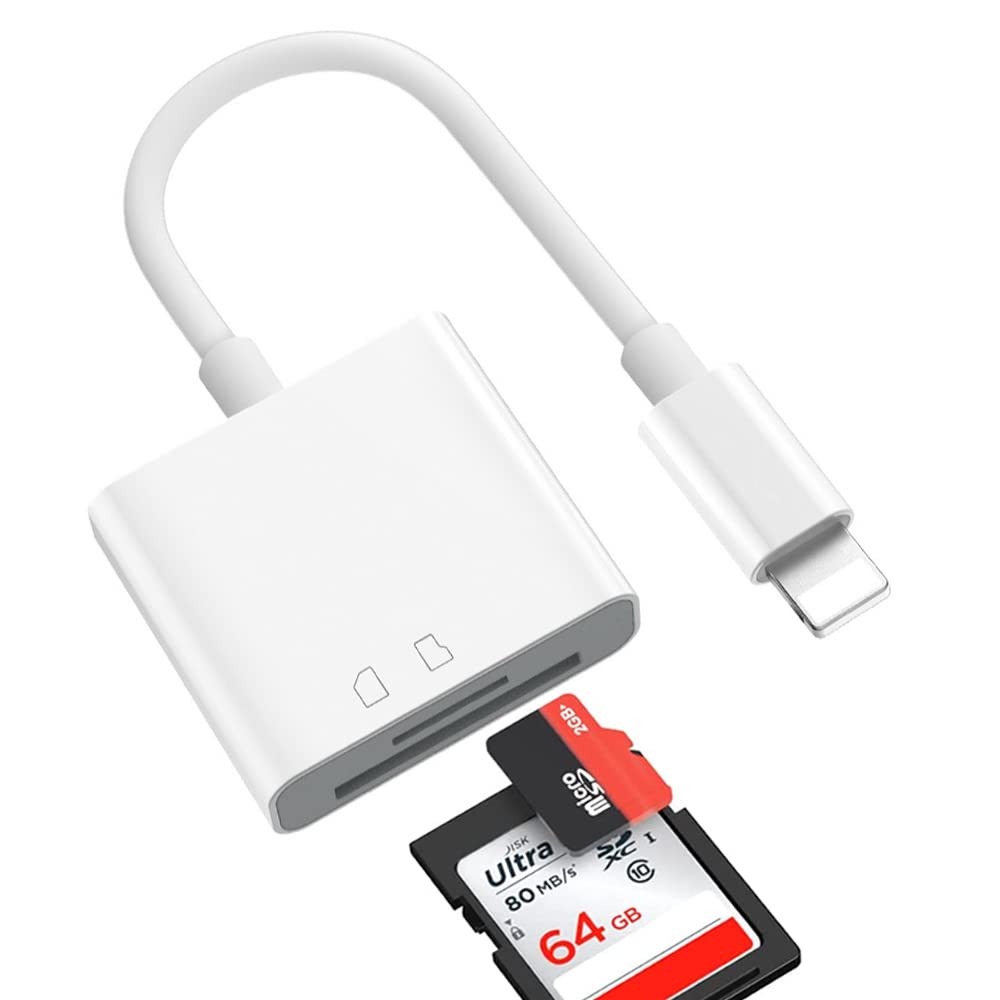
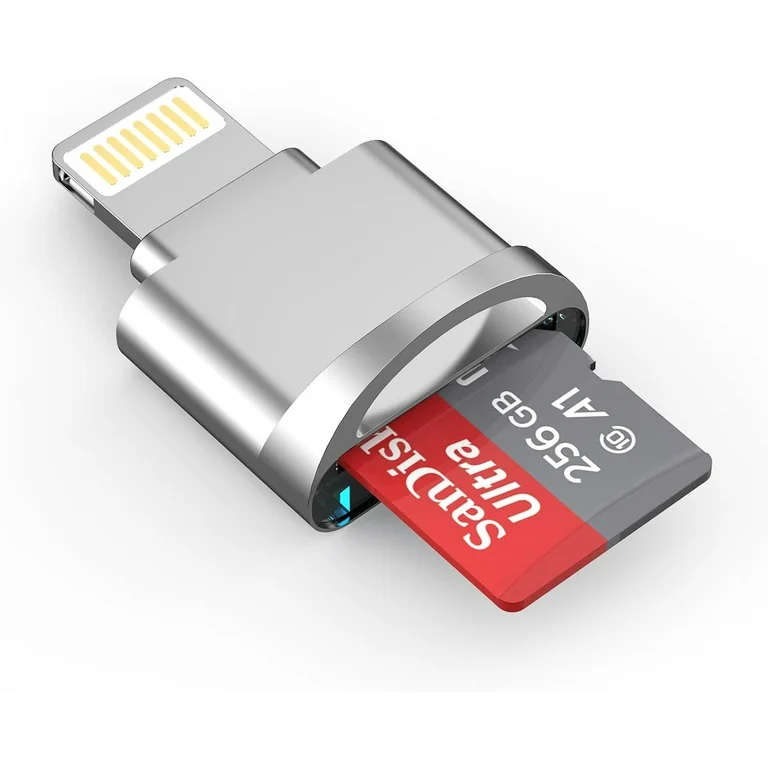
Lightning Connector Readers: These card readers boast a two-in-one design, featuring both an SD card slot and a Lightning connector that plugs directly into your iPhone’s charging port. This eliminates the need for additional adapters, making them a convenient choice for on-the-go transfers.
-
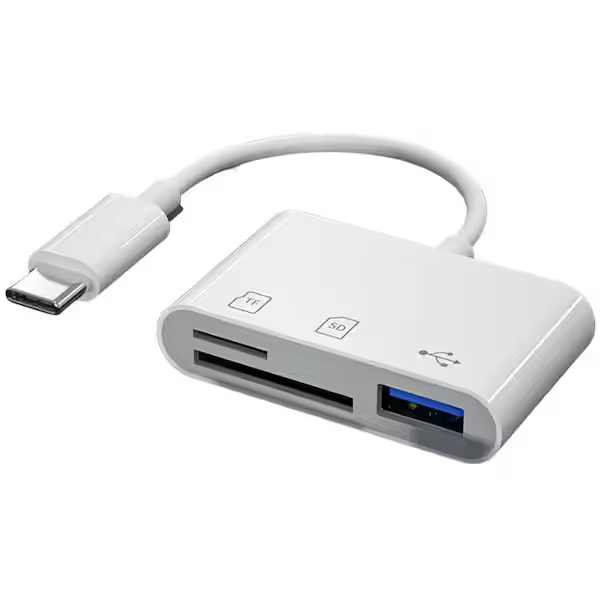
Standard SD Card Readers with Lightning Adapters: These readers typically have a USB connector on one end and an SD card slot on the other. To use them with your iPhone, you’ll need a Lightning to USB adapter (sold separately by Apple or other accessory manufacturers). While this setup requires an extra piece, it offers more flexibility, as the standard SD card reader can also be used with computers.
Once you’ve chosen your reader type, consider the type of SD card your camera uses. There are various SD card formats, with the most common being SDHC and SDXC. Ensure your card reader is compatible with the format of your SD card.
Gearing Up for Transfer: What You’ll Need
Here’s a quick checklist to ensure a smooth transfer process:
- Your iPhone: Make sure your iPhone is running the latest version of iOS for optimal compatibility.
- SD card reader: Choose the type that best suits your needs.
- SD card: The card containing the photos and videos you want to transfer.
- Lightning to USB adapter (if using a standard SD card reader): This is necessary to connect the reader to your iPhone’s Lightning port.
The Transfer Process: Step-by-Step
With everything prepared, it’s time to transfer your files! Here’s a breakdown of the steps involved:
-
Insert the SD card: Gently slide the SD card into the designated slot on your card reader, ensuring it’s facing the correct direction.
-
Connect the reader to your iPhone:
- For Lightning connector readers: Simply plug the Lightning connector directly into your iPhone’s charging port.
- For standard SD card readers: Connect the reader’s USB connector to the Lightning to USB adapter, then plug the adapter into your iPhone’s charging port.
-
Unlock your iPhone and wait: Your iPhone might prompt you to “Trust This Device” when the reader is connected. Grant permission if requested. The Files app, Apple’s default file management app, should launch automatically. If it doesn’t, locate and open the Files app on your iPhone.
-
Navigate to the SD card: Within the Files app, look for the “Locations” section. You should see your SD card reader listed there. Tap on the reader’s name to access the files on your SD card.
-
Locate and select your files: Browse the contents of your SD card. Photos and videos are typically stored in folders named “DCIM” or specific camera model folders. Tap to select the individual files you want to transfer, or tap “Select” and choose “Select All” to transfer everything on the card.
-
Import your files: Once you’ve chosen your files, tap the “Import” button (usually an upward arrow icon) located in the bottom right corner of the Files app.
-
Choose a destination folder (optional): By default, the imported files will be saved in a new folder named “Imported” within the “On My iPhone” storage of your Files app. However, you can tap on “Locations” and choose a different folder to save your files to.
Confirm and wait:
A confirmation message will appear, indicating the number of files being imported. Tap “Import” to proceed. The transfer time will vary depending on the number and size of the files.
Review and Organize (Optional):
Once the transfer is complete, you can access the imported photos and videos in the chosen destination folder within the Files app. Here, you can further organize them by creating new folders or moving them to different locations on your iPhone.
Additional Tips:
- Battery life: Ensure your iPhone has sufficient battery life before starting the transfer process. A large file transfer can drain your battery quickly.
- Free space: Make sure you have enough free space on your iPhone to accommodate the transferred files. Check your storage availability in Settings > General > iPhone Storage. If necessary, free up space by deleting unwanted apps, photos, or videos.
- Direct import to Photos app: For photos and videos specifically, you can import them directly into your iPhone’s Photos app by using Apple’s Lightning to SD Card Camera Reader. This reader bypasses the Files app and automatically imports your media into the Photos library, streamlining the process.
Recommendations for secure storage
Here are some recommendations for secure storage of your iPhone photos and videos:
Cloud Storage Services:
- iCloud Photos: This is Apple’s built-in cloud storage option for iPhones. It offers 5GB of free storage, which can fill up quickly depending on how many photos and videos you have. However, iCloud Photos integrates seamlessly with your iPhone and other Apple devices, making it easy to access your photos and videos from anywhere. Paid plans offer increased storage capacity.
- Google Photos: Google Photos offers a generous 15GB of free storage for photos and videos (though that may change in the future). It also offers a variety of features, such as automatic photo organization and facial recognition. Paid plans provide more storage.
Physical Storage Options:
- External Hard Drives: External hard drives offer a large storage capacity at a relatively low cost. They are a good option for backing up all your iPhone data, not just photos and videos. However, they are susceptible to physical damage and can be inconvenient to carry around.
- Solid State Drives (SSDs): Similar to hard drives, but generally faster and more durable due to their lack of moving parts. SSDs tend to be more expensive than hard drives of comparable capacity.
Troubleshooting Common Issues
- iPhone doesn’t recognize the card reader: Double-check that the SD card is inserted correctly and the connections are secure. Also, ensure your iPhone is unlocked and running the latest iOS version. If using a standard reader with an adapter, verify that both the reader and adapter are functioning properly.
- Files app doesn’t launch automatically: This might occur occasionally. If it doesn’t open upon connecting the reader, manually locate and launch the Files app on your iPhone.
- “Trust This Device” prompt doesn’t appear: Restart your iPhone and reconnect the card reader. If the prompt still doesn’t appear, check your iPhone’s settings under “Face ID & Passcode” or “Touch ID & Passcode” (depending on your model) and ensure “USB Accessories” is enabled.
By following these steps and tips, you should be able to effortlessly transfer photos and videos from your camera’s SD card to your iPhone using a card reader. This not only frees up space on your camera but also creates a convenient backup of your precious memories on your iPhone, allowing you to cherish them on the go.