The Nintendo Switch is a fantastic console, offering both portability and home console experiences. But its internal storage can fill up quickly, especially with today’s ever-growing game sizes. Thankfully, Nintendo equips the Switch with a microSD card slot, allowing you to significantly expand its storage capacity. If you’re new to the Switch or just haven’t gotten around to adding extra storage yet, this guide will walk you through the simple process of inserting a microSD card into your console.
Before You Begin
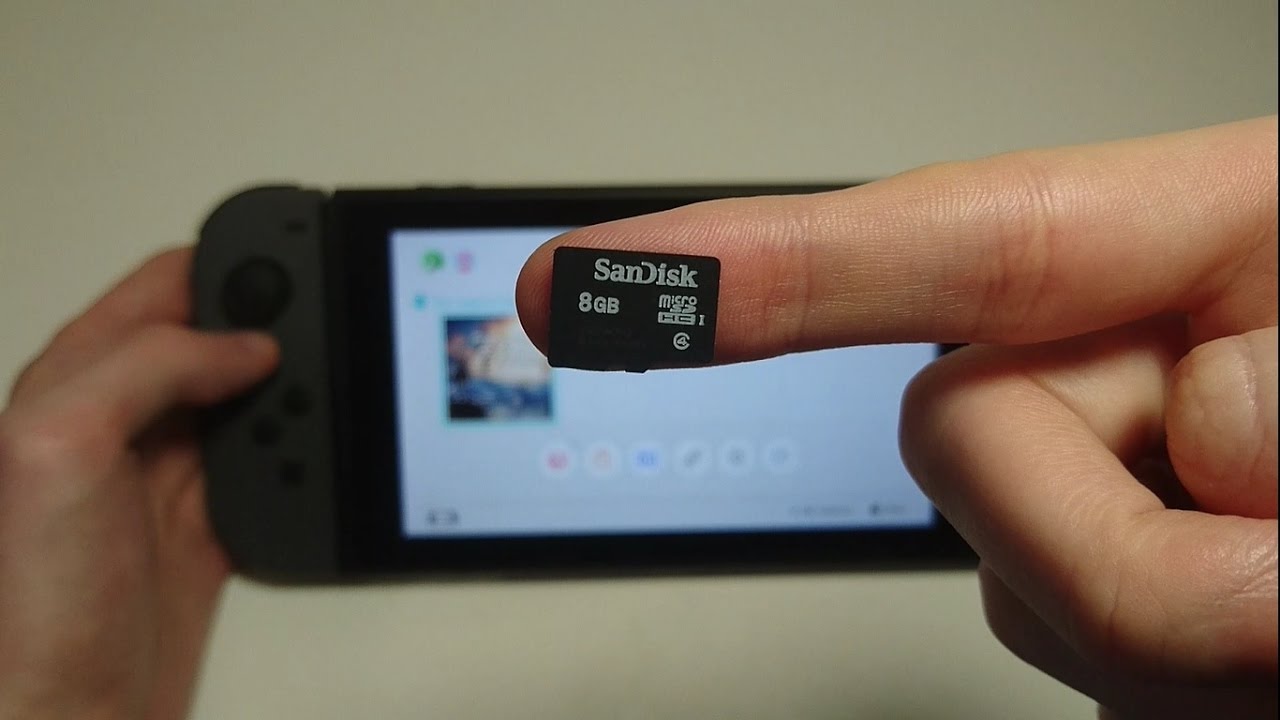
There are a few things to keep in mind before diving in. First, make sure you have a microSD card. The Switch is compatible with microSDXC cards, with capacities ranging from 64GB to 2TB. While larger capacities are tempting, it’s important to check the read/write speeds of the card. For optimal performance, aim for a card with UHS-I or U3 speed class. These will ensure smooth gameplay without any lag or stuttering.
Next, power down your Nintendo Switch completely. This is a crucial step to prevent any data corruption or damage to the console or microSD card. Finally, locate the microSD card slot on your Switch.
Finding the MicroSD Card Slot
The location of the microSD card slot differs slightly between the original Nintendo Switch model and the Switch Lite. Here’s a breakdown for both:
-
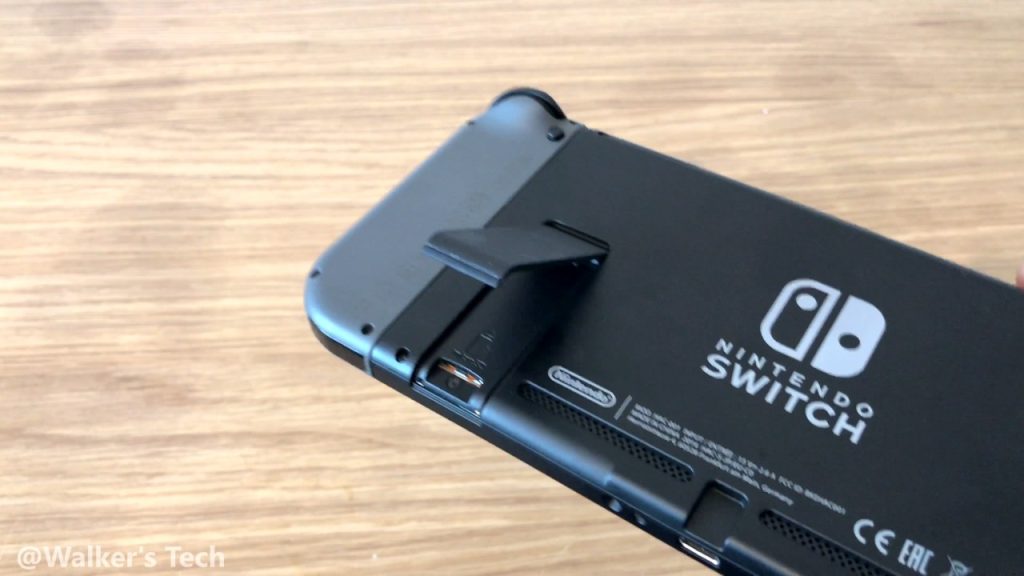
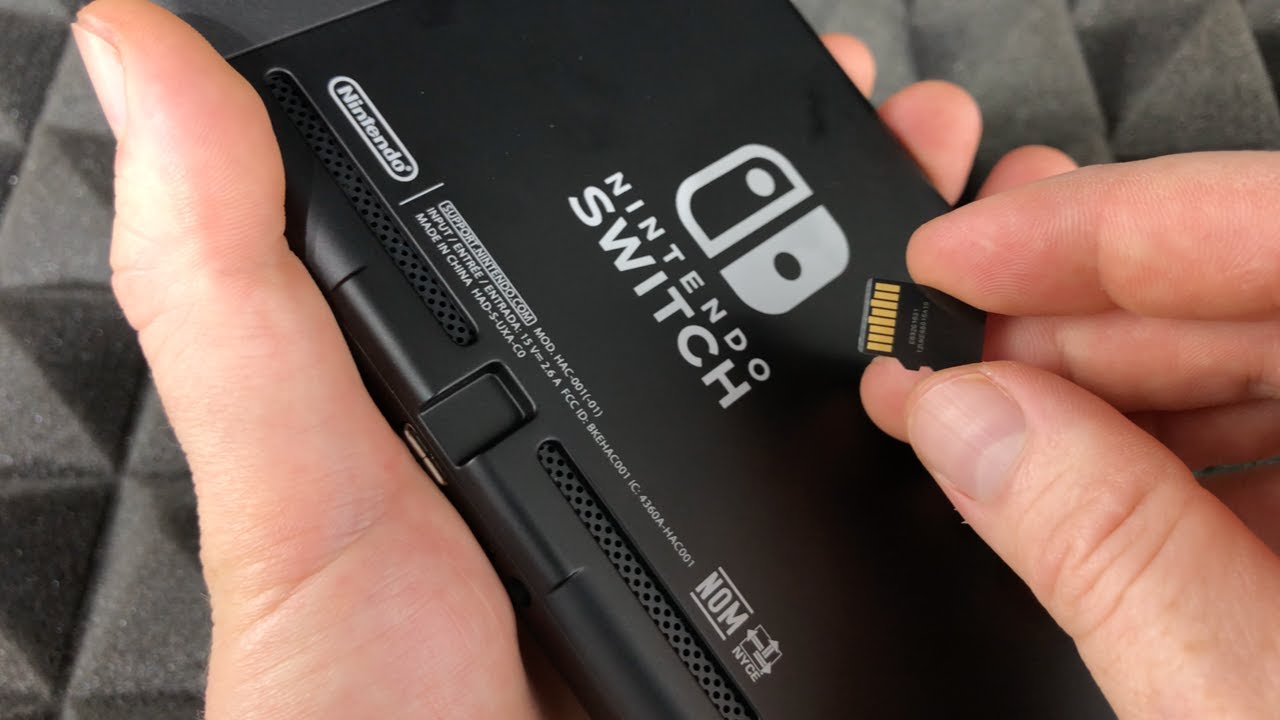
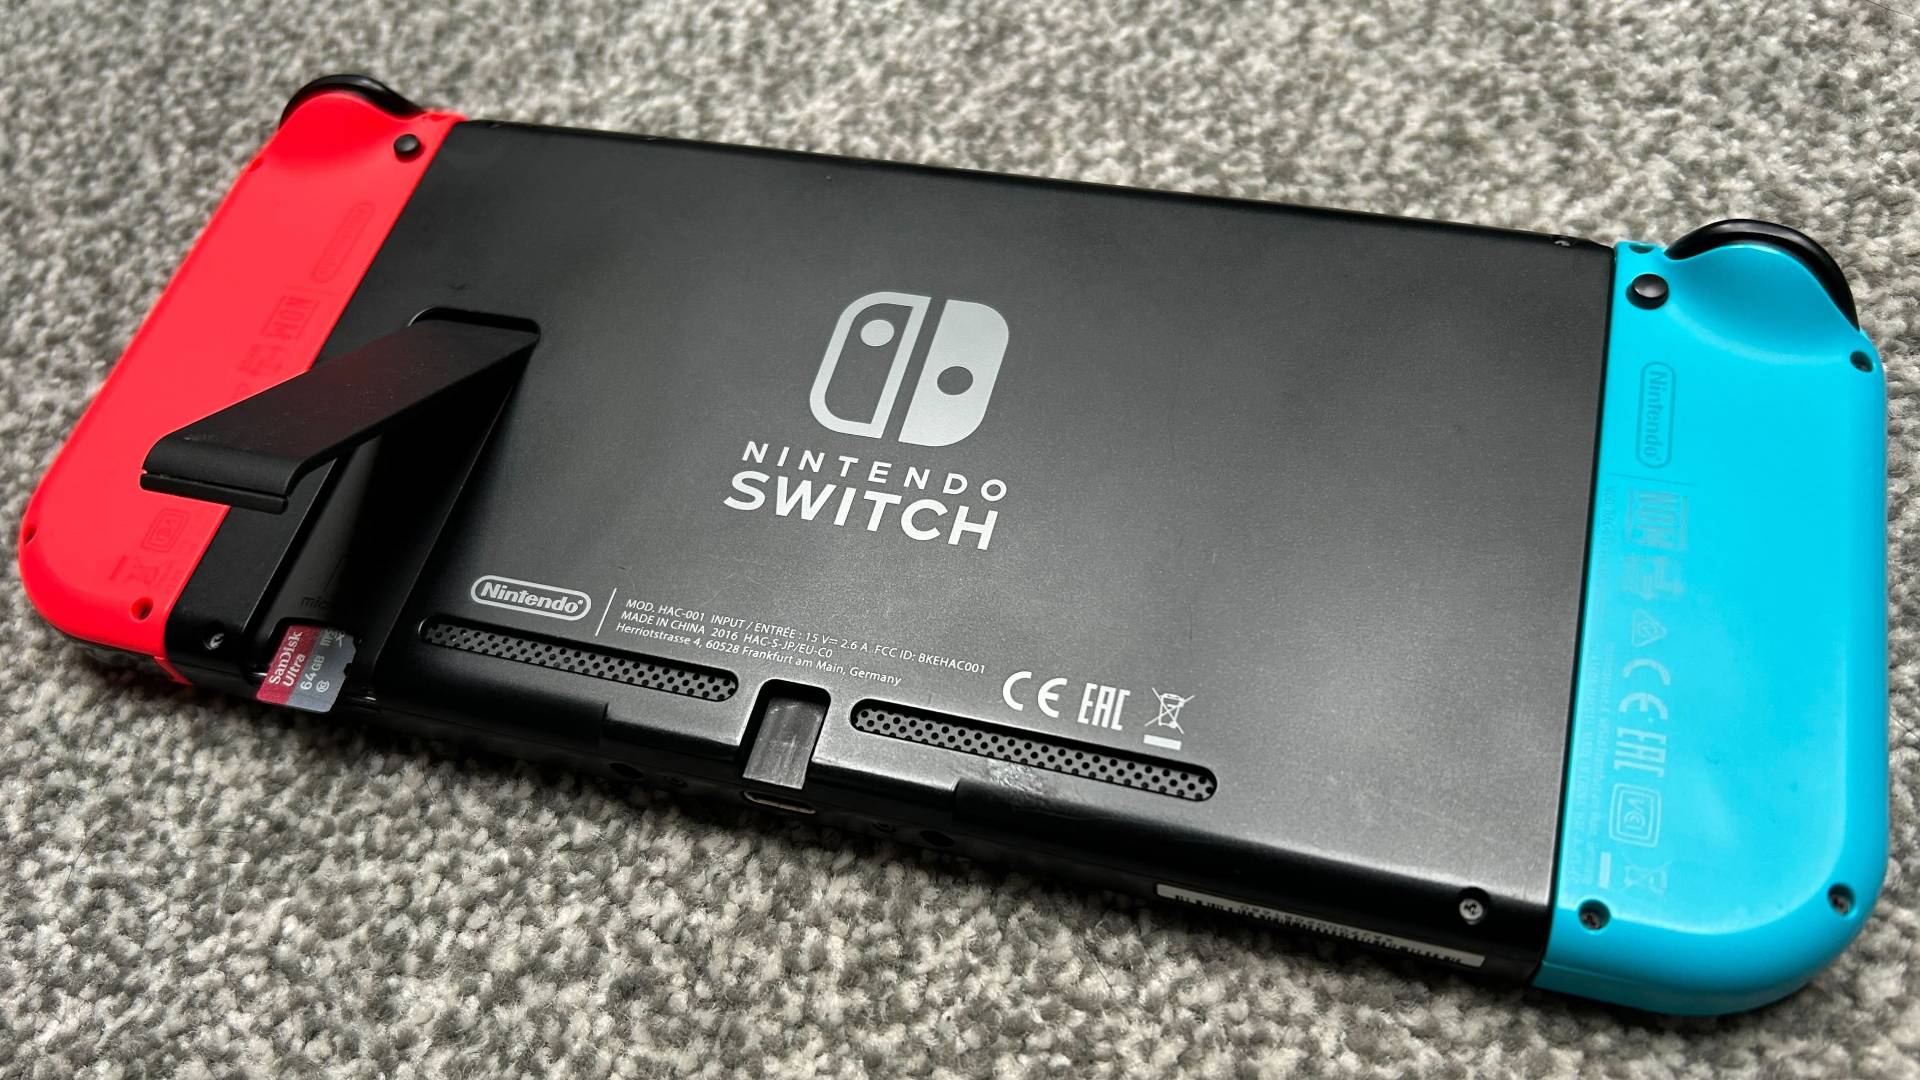
Original Switch Model: The microSD card slot is located on the back of the console, underneath the adjustable kickstand. To access it, simply flip the Switch over and gently pry open the kickstand. This will reveal a small compartment with the microSD card slot clearly marked.
-
Switch Lite: The microSD card slot on the Switch Lite is conveniently located on the right side of the console, near the bottom. There’s a small flap covering the slot, which you can easily open with your fingernail.
Inserting the MicroSD Card
Now that you’ve found the slot, it’s time to insert the microSD card. Here’s what to do:
-
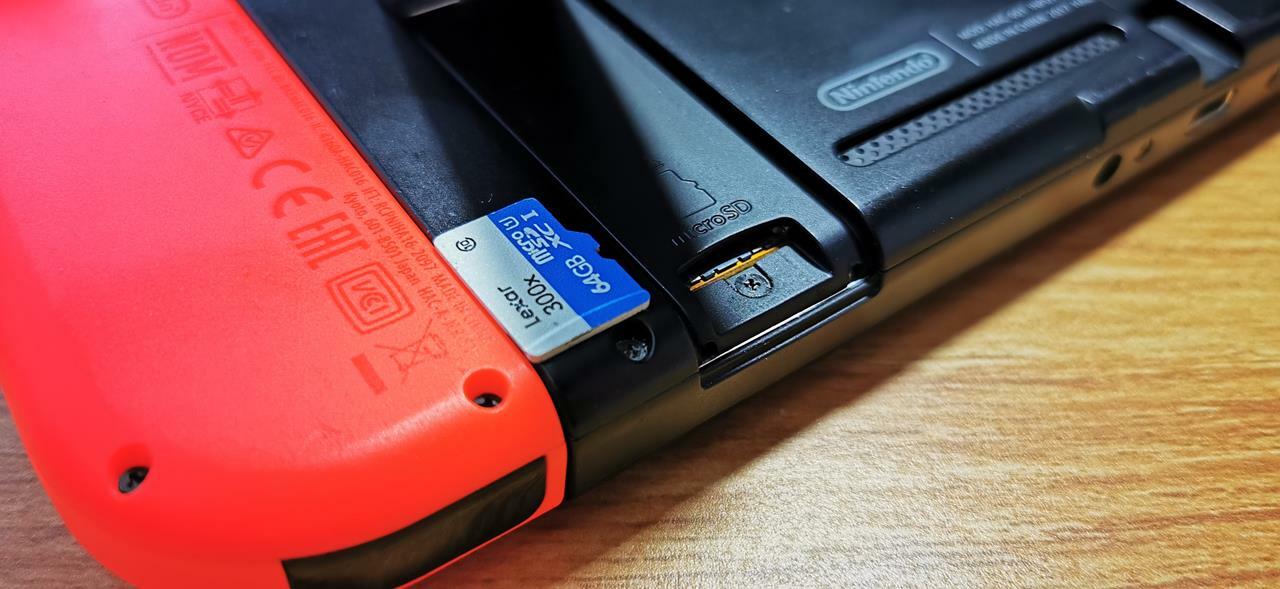
Hold the microSD card with the label facing away from the console. The card has a small notch on one corner, which should be oriented towards the top of the slot.
-
Carefully slide the microSD card into the slot until you feel a slight resistance. Don’t force it in; the card should fit snugly but easily.
-
Apply gentle pressure until you hear a satisfying click. This confirms that the card is properly inserted and locked in place.
Formatting the MicroSD Card (Optional)
In most cases, the Switch will automatically format the microSD card for use the first time you insert it. However, if you’ve used the card in another device previously, it might need formatting. Here’s how to check and format the card if necessary:
-
From the Switch’s home menu, navigate to “System Settings.”
-
Scroll down and select “Storage.”
-
You should see your microSD card listed under “Storage.” If it’s not formatted, there will be an option to “Format microSD Card.”
-
Select “Format microSD Card” and confirm your choice. Be aware that formatting will erase all data on the card, so back up anything important beforehand.
Enjoying Your Expanded Storage
Once the microSD card is inserted and formatted (if needed), your Switch will automatically recognize it and start using it for additional storage. You can now download games, save data, and install updates directly to the microSD card.
Troubleshooting Tips
Inserting a microSD card into your Switch is a breeze, but sometimes things don’t go according to plan. Here’s a breakdown to help you troubleshoot common microSD card woes:
Switch Doesn’t Recognize the Card
- Double-Check Insertion: Make sure the card is clicked into place with the notch oriented correctly (refer to the main article for details).
- Clean the Card: A gentle wipe with a dry cloth can remove dust that might hinder recognition.
- Try a Different Card: This helps isolate the issue. If another card works, the original might be faulty.
- Restart the Switch: A simple reboot can often fix minor glitches.
Formatting Issues
- Compatibility Check: Ensure your microSD card is a microSDXC card with UHS-I or U3 speed class.
- Format on Switch: If used elsewhere, format it on the Switch via “System Settings” -> “Storage” -> “Format microSD Card.”
Error Messages
- Note the Error Code: These codes provide clues about the issue. Search online or check Nintendo’s support website for specific troubleshooting steps.
Bonus Tips
- Brand Matters: Choose well-known, reliable brands for your microSD cards.
- Minimize Removals: Frequent removal can wear down the slot and card. Take it out only when needed.
- Regular Backups: Back up your save data to Nintendo Switch Online to avoid losing progress due to card issues.
These tips should help you tackle most microSD card problems on your Switch. If the issue persists, consider contacting Nintendo support for further assistance.
Provide troubleshooting tips for resolving any potential problems
While inserting a microSD card into your Switch is a straightforward process, there can be occasional hiccups. Here’s how to troubleshoot some common problems you might encounter:
The Switch Doesn’t Recognize the MicroSD Card
-
Double-Check Insertion: First, ensure the card is inserted correctly. Refer to the guide above for proper orientation and confirm it’s clicked into place.
-
Clean the Card: Sometimes, dust or debris on the card’s contacts can prevent recognition. Gently wipe the contacts with a clean, dry cloth.
-
Try a Different Card: If the issue persists, try inserting a different microSD card. This will help determine if the problem lies with the specific card you’re using.
-
Restart the Switch: A simple restart can often resolve minor glitches. Power down the Switch completely, wait for a few seconds, and then turn it back on.
Additional Tips
Here are some extra pointers for using a microSD card with your Switch:
-
Manage Your Storage: You can check your remaining storage space and manage data across your internal storage and microSD card in the “System Settings” menu under “Storage.”
-
Prioritize Downloads: You can choose the default location for game downloads and updates in the “System Settings” menu under “Software Update.” This lets you decide whether to prioritize the internal storage or the microSD card.
-
Moving Data: If you already have games or saves stored on the internal storage, you can easily transfer them to the microSD card using the “Data Management” option in the “System Settings” menu.
By following these simple steps, you can effortlessly expand your Switch’s storage capacity and download more games, demos, and updates without worrying about running out of space. With a microSD card in place, your Switch is ready for endless hours of gaming adventures!